The Voracious Resurgence | |
| Prime Weapons • Ultimate Weapons • Ultimate Augments • Abjurations iL119 • JSE Necks • Divergence Augments • Escutcheons | |
| Reforged Armor Artifact: +1 • iL109 • iL119/+2/+3 Relic: +1/+2 • iL109 • iL119/+2/+3 Empyrean: +1/+2 • iL109 • iL119/+2/+3 |
Guides • Crafting • Trusts • Apex Monsters |
Category:Einherjar: Difference between revisions
| (40 intermediate revisions by 9 users not shown) | |||
| Line 1: | Line 1: | ||
{{Category Page Header |
|||
[[Image:Einherjar.jpg|right]] |
|||
|ToC= y |
|||
|Float=left |
|||
|Image=Einherjar.jpg |
|||
|Image Size=350 |
|||
|Image Link= |
|||
|Intro Text='''Einherjar''' ''("ɪəŋ[E-yhn]-hair[h~er]-yar")'', meaning "army of one" or "those who fight alone", is a battlefield event which occurs in the [[Hazhalm Testing Grounds]].<br /> |
|||
The ultimate goal is to gain entry to [[Valgrind]] and defeat the dark rider [[Odin (Notorious Monster)|Odin]]. |
|||
The testing grounds are divided into three separate wings, with each wing consisting of three large chambers. Each chamber houses a horde of enemies and a boss-type character known as a Guardian of Asgarth.<br /> |
|||
=Overview= |
|||
All the monsters in a chamber must be defeated within a certain time limit to clear the area. |
|||
===What is Einherjar?=== |
|||
Einherjar is an ever-changing multiplayer battlefield based in the [[Hazhalm Testing Grounds]]. |
|||
===What are the Hazhalm Testing Grounds?=== |
|||
The training grounds are divided into three separate wings, with each wing consisting of three large chambers. Each chamber houses a horde of enemies and a boss-type character known as a Guardian of Asgarth. All the monsters in a chamber must be defeated within a certain time limit to clear the area. Once the three chambers in wing I have been cleared, the path to wing II will open. Only after all three wings have been cleared will players be given the opportunity to enter Valgrind and learn the secret the forbidden chamber holds. |
|||
Once the three chambers in wing I have been cleared, the path to wing II will open.<br /> |
|||
Only after all three wings have been cleared will players be given the opportunity to enter Valgrind and learn the secret the forbidden chamber holds. |
|||
}} |
|||
=Details= |
=Details= |
||
| Line 16: | Line 21: | ||
*1. Players who have installed the Aht Urhgan Expansion disc and registered its contents. |
*1. Players who have installed the Aht Urhgan Expansion disc and registered its contents. |
||
*2. Players who are level 60 or higher. |
*2. Players who are level 60 or higher. |
||
*3. Parties/Alliances with |
*3. Solo/Parties/Alliances with 1-36 members. |
||
Note: Players need not have completed any Aht Urhgan missions or mercenary promotion quests to participate. |
Note: Players need not have completed any Aht Urhgan missions or mercenary promotion quests to participate. |
||
| Line 23: | Line 28: | ||
Players are required to take the following steps to enter the Hazhalm Testing Grounds: |
Players are required to take the following steps to enter the Hazhalm Testing Grounds: |
||
'''1. Obtain a [[ |
'''1. Obtain a [[File:Smoldering Lamp icon.png|22px|link=]] [[Smoldering Lamp]]:'''<br> |
||
Smoldering lamps can be purchased from [[Kilusha]] in [[Nashmau]] for 60,000 gil. Only one smoldering lamp is necessary for an entire group to enter the battlefield. |
|||
*Upon completion of [[Rhapsodies of Vanadiel Mission 1-16]] and obtaining the Key Item [["Rhapsody in Azure"]], the cost is lowered to 1,000 gil and the entry time is reduced to once every Earth hour. |
|||
'''2. Make a reservation:'''<br> |
'''2. Make a reservation:'''<br> |
||
| Line 31: | Line 37: | ||
** Reserving player possesses the [[Mark of the Einherjar]] key item. |
** Reserving player possesses the [[Mark of the Einherjar]] key item. |
||
*Reservations may only be made for [[Valgrind]] by players who possess at least one feather from each of wings 1, 2, and 3. |
*Reservations may only be made for [[Valgrind]] by players who possess at least one feather from each of wings 1, 2, and 3. |
||
** All players entering [[Valgrind]] will also need at least one feather from each of wings 1, 2, and 3. |
|||
*Reservations last 30 minutes from the moment they are made. |
*Reservations last 30 minutes from the moment they are made. |
||
*If less than six people occupy the area 10 minutes after the reservation is made, the reservation will be automatically cancelled, regardless of the time remaining on the lamp. At this point, the glowing lamp will become void and players will not be allowed re-entry with it. |
|||
*A reservation's time limit can be viewed in the glowing lamp's help window. |
*A reservation's time limit can be viewed in the glowing lamp's help window. |
||
*If another party already occupies the selected chamber, the |
*If another party already occupies the selected chamber, the smoldering lamp will not light, and players can either select another chamber or wait for the one they chose to open. Note: [[Odin's Chamber]] and [[Odin's Chamber II]] occupy the same space, so only one or the other may be accessed by a group at any given time. |
||
*There are no longer any time limitations placed on parties smaller then 6 as of September 2015. |
|||
Trading a |
Trading a [[Smoldering Lamp]] to the '''Entry Gate''' in the [[Hazhalm Testing Grounds]] will open a dialogue with several options, including the option to reserve a particular chamber. Upon making the chamber reservation, the Smoldering Lamp will be replaced with a [[File:Glowing Lamp icon.png|22px|link=]] [[Glowing Lamp]]. |
||
'''3. Copy and distribute glowing lamps:'''<br> |
'''3. Copy and distribute glowing lamps:'''<br> |
||
| Line 45: | Line 52: | ||
===What happens if I leave the area?=== |
===What happens if I leave the area?=== |
||
If players leave the area via magic or by returning to their Home Points, they will not be allowed re-entry into the chamber, regardless of time remaining on the reservation. After entering a chamber, players will be required to wait at least |
If players leave the area via magic or by returning to their Home Points, they will not be allowed re-entry into the chamber, regardless of time remaining on the reservation. After entering a chamber, players will be required to wait at least '''20 Earth hours''' before they can enter the training grounds again. |
||
*Note: The person that makes the reservation, their timer starts the moment they did or after the 3 minute entrance grace period, it's one of them. Not once they actually enter. |
|||
*Upon completion of [[Rhapsodies of Vanadiel Mission 1-16]] and obtaining the Key Item '''[["Rhapsody in Azure"]]''', the lockout period is reduced to just one Earth hour. |
|||
Note: If all players in a chamber remain KO'd for more than 3 minutes, everyone will be teleported out of the area. |
|||
Players can check the amount of time remaining (in Vana'diel days) before they may re-enter Hazhalm by checking the Entry Gate in [[Hazhalm Testing Grounds]]. |
|||
If all players in a chamber remain KO'd for more than 3 minutes, everyone will be teleported out of the area. |
|||
{{color|red|Note}}: If a player leaves their reserved chamber by Teleporting, Returning to their Home Point, or any forms of Warp, any ampoules of viscous [[Therion Ichor]] is forfeit. |
|||
*A player '''teleported out of the area to the entrance''' in order to be compensated with earned Ichor. This can be done the following ways: |
|||
*Dropping your [[Glowing Lamp]]. |
|||
*Being teleported out of the area upon all participants being KO'd for 3 minutes. |
|||
*Time expiration. |
|||
===What do I do inside?=== |
===What do I do inside?=== |
||
| Line 62: | Line 81: | ||
While fighting in the wing one, two, and three chambers, one of four special monsters will appear several minutes into the battle. Defeating (or not defeating) the monster will have one of several effects as listed below. [[Heithrun]] is significantly rarer than the other three. |
While fighting in the wing one, two, and three chambers, one of four special monsters will appear several minutes into the battle. Defeating (or not defeating) the monster will have one of several effects as listed below. [[Heithrun]] is significantly rarer than the other three. |
||
{| border=" |
{| style="border: 1px solid #6ea9e5; max-width: 800px" cellspacing="0" cellpadding="0" width="100%" |
||
|- |
|||
|- BGCOLOR="#cee0f2" |
|||
| |
|||
! Name |
|||
{| width="100%" border=0 |
|||
! Type |
|||
|- BGCOLOR="#ADBDCC" |
|||
! Effect of killing |
|||
! width="15%" | Name |
|||
|- align="center" |
|||
! width="15%" | Type |
|||
| [[Muninn]] |
|||
! width="70%" | Effect of killing |
|||
|- BGCOLOR="#EAF0FF" align="center" |
|||
| BGCOLOR="#CEE0F2" | [[Muninn]] |
|||
| [[:Category:Birds|Dark Bird]] |
| [[:Category:Birds|Dark Bird]] |
||
| Weakens monsters in the zone.<br /> |
| Weakens monsters in the zone.<br /> |
||
"The chamber's stagnant aura has somewhat cleared...<br /> |
"The chamber's stagnant aura has somewhat cleared...<br /> |
||
The creatures lurking in the shadows have calmed..." |
The creatures lurking in the shadows have calmed..." |
||
|- align="center" |
|- BGCOLOR="#FFFFFF" align="center" |
||
| [[Huginn]] |
| BGCOLOR="#CEE0F2" | [[Huginn]] |
||
| [[:Category:Birds|Red Bird]] |
| [[:Category:Birds|Red Bird]] |
||
| Creates a chest containing many temporary items upon defeat. |
| Creates a chest containing many temporary items upon defeat. |
||
|- align="center" |
|- BGCOLOR="#EAF0FF" align="center" |
||
| [[Saehrimnir]] |
| BGCOLOR="#CEE0F2" | [[Saehrimnir]] |
||
| [[:Category:Tiger|Tiger]] |
| [[:Category:Tiger|Tiger]] |
||
| When '''not''' killed, monsters in the zone become more powerful. |
| When '''not''' killed, monsters in the zone become more powerful. |
||
|- align="center" |
|- BGCOLOR="#FFFFFF" align="center" |
||
| [[Heithrun]] |
| BGCOLOR="#CEE0F2" | [[Heithrun]] |
||
| [[:Category:Sheep|Sheep]] |
| [[:Category:Sheep|Sheep]] |
||
| Increases the drop rates of items in the final Item Chest, such as crafting materials and abjurations. |
| Increases the drop rates of items in the final Item Chest, such as crafting materials and abjurations. |
||
|- |
|||
|} |
|||
|- |
|- |
||
|} |
|} |
||
===Einherjar Wings=== |
===Einherjar Wings=== |
||
{| style="border: 1px solid white; max-width: 800px" cellspacing="0" cellpadding="0" width="100%" |
|||
{| width=700px border=0 |
|||
|- |
|||
| |
|||
{| width="100%" border=0 |
|||
|- BGCOLOR="#ADBDCC" align="center" |
|- BGCOLOR="#ADBDCC" align="center" |
||
| colspan=3 | '''[[Einherjar Wing One Chambers]]''' |
| colspan=3 | '''[[Einherjar Wing One Chambers]]''' |
||
| Line 111: | Line 138: | ||
| colspan=3 | '''[[Valgrind]]''' |
| colspan=3 | '''[[Valgrind]]''' |
||
|- BGCOLOR="#FF77FF" align="center" |
|- BGCOLOR="#FF77FF" align="center" |
||
| BGCOLOR="#FFFFFF" | |
|||
| [[Odin's Chamber]] |
| [[Odin's Chamber]] |
||
| [[Odin's Chamber II]] |
|||
| BGCOLOR="#FFFFFF" | |
| BGCOLOR="#FFFFFF" | |
||
|- BGCOLOR="#FF77FF" align="center" |
|||
| BGCOLOR="#FFFFFF" | |
|||
| [[Odin's Chamber II]] |
|||
| BGCOLOR="#FFFFFF" | |
| BGCOLOR="#FFFFFF" | |
||
|- |
|||
|} |
|||
|- |
|- |
||
|} |
|} |
||
=Rewards= |
=Rewards= |
||
[[File:Einherjar Rewards.jpg|right|link=]] |
|||
In wings one through three, after defeating all the enemies in a chamber, an armoury crate will appear in the middle of the room. Odin will drop items immediately upon defeat. After exiting a chamber by dropping the [[Glowing Lamp]] or timing out, Ichor will also be received, which may be exchanged for various rewards. |
In wings one through three, after defeating all the enemies in a chamber, an armoury crate will appear in the middle of the room. Odin will drop items immediately upon defeat. After exiting a chamber by dropping the [[Glowing Lamp]] or timing out, Ichor will also be received, which may be exchanged for various rewards. |
||
===[[Key Items]]: [[Einherjar Feathers]]=== |
===[[Key Items]]: [[Einherjar Feathers]]=== |
||
Upon clearing a chamber and opening the armoury crate, all players will receive a key item feather. There is one for each chamber, and |
Upon clearing a chamber and opening the armoury crate, all players will receive a key item feather. There is one for each chamber, and the run leader (and each member of the alliance) will need at least one from each rank to enter into either of Odin's Chambers in [[Valgrind]]. All of the feathers from all players will vanish at the moment of entry into Valgrind. Players who either possess one feather from each tier or have defeated Odin (level 75) in the past (obtaining the title "Elite Einherjar") can obtain a [[Mark of the Einherjar]] by clicking the ??? spot in [[Hazhalm Testing Grounds]]. This allows them to reserve entry into any wing 2 or 3 chambers without having to clear chambers from previous wings and most importantly allows them to spend ichor to purchase items which can be traded for feathers (see below). |
||
===[[Therion Ichor]]=== |
===[[Therion Ichor]]=== |
||
Upon exiting the chamber, players will also receive ampoules of Therion Ichor depending on the chamber tier and what percentage of the base (non-boss) monsters were defeated. These can be used to purchase various items from [[Kilusha]] in Nashmau. Killing the boss (with the exception of [[Odin]]) awards no extra Ichor |
Upon exiting the chamber, players will also receive ampoules of Therion Ichor depending on the chamber tier and what percentage of the base (non-boss) monsters were defeated. These can be used to purchase various items from [[Kilusha]] in Nashmau. Killing the boss (with the exception of [[Odin]]) awards no extra Ichor. Note that a chamber MUST be exited by dropping the [[Glowing Lamp]] or timing out in order to receive ichor. Players who warp or home point away from the battlefield will not receive ichor. |
||
{| border="1" width= |
{| style="border: 1px solid #6ea9e5;" cellspacing="1" cellpadding="0" width="400px" |
||
|- |
|||
|- BGCOLOR="#cee0f2" |
|||
| |
|||
! Name |
|||
{| width="100%" border=0 cellspacing="1" |
|||
! Ichor |
|||
|- |
|- BGCOLOR="#ADBDCC" |
||
! width="60%" | Chamber |
|||
| Tier 1 |
|||
! width="40%" | Ichor |
|||
|- BGCOLOR="#EAF0FF" align="center" |
|||
! BGCOLOR="#CEE0F2" | Wing 1 |
|||
| 960 Ichor |
| 960 Ichor |
||
|- align="center" |
|- BGCOLOR="#FFFFFF" align="center" |
||
! BGCOLOR="#CEE0F2" | Wing 2 |
|||
| Tier 2 |
|||
| 1440 Ichor |
| 1440 Ichor |
||
|- align="center" |
|- BGCOLOR="#EAF0FF" align="center" |
||
! BGCOLOR="#CEE0F2" | Wing 3 |
|||
| Tier 3 |
|||
| 1920 Ichor |
| 1920 Ichor |
||
|- align="center" |
|- BGCOLOR="#FFFFFF" align="center" |
||
! BGCOLOR="#CEE0F2" | [[Odin's Chamber]] |
|||
| Valgrind |
|||
| 2880 Ichor |
| 2880 Ichor |
||
|- BGCOLOR="#EAF0FF" align="center" |
|||
! BGCOLOR="#CEE0F2" | [[Odin's Chamber II]] |
|||
| 3600 Ichor |
|||
|- |
|||
|} |
|||
|- |
|- |
||
|} |
|} |
||
| Line 151: | Line 185: | ||
The following unique items can be purchased with Therion Ichor: |
The following unique items can be purchased with Therion Ichor: |
||
* These items can only be purchased with the [[Mark of the Einherjar]] in possession. They can be exchanged at the ??? in [[Hazhalm Testing Grounds]] for one of the KI feathers corresponding to each wing. |
* These items can only be purchased with the [[Mark of the Einherjar]] in possession. They can be exchanged at the ??? in [[Hazhalm Testing Grounds]] for one of the KI feathers corresponding to each wing. |
||
** '''1,000 Ichor''': [[Valkyrie's Tear]] (wing one feather) |
** '''1,000 Ichor''': [[File:Valkyrie's Tear icon.png|22px|link=]] [[Valkyrie's Tear]] (wing one feather) |
||
** '''2,000 Ichor''': [[Valkyrie's Wing]] (wing two feather) |
** '''2,000 Ichor''': [[File:Valkyrie's Wing icon.png|22px|link=]] [[Valkyrie's Wing]] (wing two feather) |
||
** '''3,000 Ichor''': [[Valkyrie's Soul]] (wing three feather) |
** '''3,000 Ichor''': [[File:Valkyrie's Soul icon.png|22px|link=]] [[Valkyrie's Soul]] (wing three feather) |
||
* These items may be purchased at any time. |
* These items may be purchased at any time. |
||
** '''5,000 Ichor''' (Cursed Item Materials): [[Rubber Cap]], [[Rubber Harness]], [[Rubber Gloves]], [[Rubber Chausses]], [[Rubber Soles]], [[Nethereye Chain]], [[Netherfield Chain]], [[Netherspirit Chain]], [[Nethercant Chain]], [[Netherpact Chain]] |
** '''5,000 Ichor''' (Cursed Item Materials): [[Rubber Cap]], [[Rubber Harness]], [[Rubber Gloves]], [[Rubber Chausses]], [[Rubber Soles]], [[Nethereye Chain]], [[Netherfield Chain]], [[Netherspirit Chain]], [[Nethercant Chain]], [[Netherpact Chain]] |
||
| Line 164: | Line 198: | ||
===Odin Equipment=== |
===Odin Equipment=== |
||
Aside from the Einherjar-specific abjuration sets, the only other drops unique to Einherjar are exclusively obtained by defeating Odin in [[Valgrind]]. Upon defeat, there is a chance that Odin will drop one of the unique items from the list below, depending on the version of Odin which was battled. |
Aside from the Einherjar-specific abjuration sets, the only other drops unique to Einherjar are exclusively obtained by defeating Odin in [[Valgrind]]. Upon defeat, there is a chance that Odin will drop one of the unique items from the list below, depending on the version of Odin which was battled. |
||
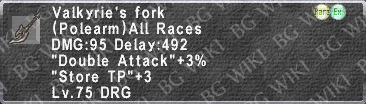
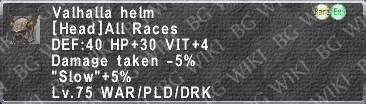
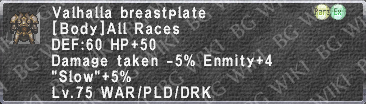
* [[Odin's Chamber]] (Level 75) |
* '''[[Odin's Chamber]]''' (Level 75) |
||
**[[File:Hofud icon.png|22px|link=]] <span class="has-image-popup">[[Hofud]]<span class="image-popup" style="z-index: 10;width: ??? px; padding: 1px; background-color: #; border: 1px solid #DDDDDD; text-align: center;">[[File:Hofud description.png|link=Hofud]]</span></span> |
|||
** [[Hofud]] |
|||
**[[File:Valkyrie's Fork icon.png|22px|link=]] <span class="has-image-popup">[[Valkyrie's Fork]]<span class="image-popup" style="z-index: 10;width: ??? px; padding: 1px; background-color: #; border: 1px solid #DDDDDD; text-align: center;">[[File:Valkyrie's Fork description.png|link=Valkyrie's Fork]]</span></span> |
|||
** [[Valkyrie's Fork]] |
|||
**[[File:Valhalla Helm icon.png|22px|link=]] <span class="has-image-popup">[[Valhalla Helm]]<span class="image-popup" style="z-index: 10;width: ??? px; padding: 1px; background-color: #; border: 1px solid #DDDDDD; text-align: center;">[[File:Valhalla Helm description.png|link=Valhalla Helm]]</span></span> |
|||
** [[Valhalla Helm]] |
|||
**[[File:Valhalla Breastplate icon.png|22px|link=]] <span class="has-image-popup">[[Valhalla Breastplate]]<span class="image-popup" style="z-index: 10;width: ??? px; padding: 1px; background-color: #; border: 1px solid #DDDDDD; text-align: center;">[[File:Valhalla Breastplate description.png|link=Valhalla Breastplate]]</span></span> |
|||
** [[Valhalla Breastplate]] |
|||
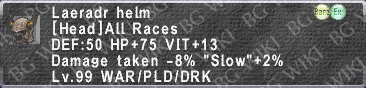
* [[Odin's Chamber II]] (Level 99) |
* '''[[Odin's Chamber II]]''' (Level 99) |
||
**[[File:Heimdall's Doom icon.png|22px|link=]] <span class="has-image-popup">[[Heimdall's Doom]]<span class="image-popup" style="z-index: 10;width: ??? px; padding: 1px; background-color: #; border: 1px solid #DDDDDD; text-align: center;">[[File:Heimdall's Doom description.png|link=Heimdall's Doom]]</span></span> |
|||
** [[Heimdall's Doom]] |
|||
**[[File:Herja's Fork icon.png|22px|link=]] <span class="has-image-popup">[[Herja's Fork]]<span class="image-popup" style="z-index: 10;width: ??? px; padding: 1px; background-color: #; border: 1px solid #DDDDDD; text-align: center;">[[File:Herja's Fork description.png|link=Herja's Fork]]</span></span> |
|||
** [[Herja's Fork]] |
|||
**[[File:Laeradr Helm icon.png|22px|link=]] <span class="has-image-popup">[[Laeradr Helm]]<span class="image-popup" style="z-index: 10;width: ??? px; padding: 1px; background-color: #; border: 1px solid #DDDDDD; text-align: center;">[[File:Laeradr Helm description.png|link=Laeradr Helm]]</span></span> |
|||
** [[Laeradr Helm]] |
|||
**[[File:Laeradr Breastplate icon.png|22px|link=]] <span class="has-image-popup">[[Laeradr Breastplate]]<span class="image-popup" style="z-index: 10;width: ??? px; padding: 1px; background-color: #; border: 1px solid #DDDDDD; text-align: center;">[[File:Laeradr Breastplate description.png|link=Laeradr Breastplate]]</span></span> |
|||
** [[Laeradr Breastplate]] |
|||
**[[File:Eihwaz Ring icon.png|22px|link=]] <span class="has-image-popup">[[Eihwaz Ring]]<span class="image-popup" style="z-index: 10;width: ??? px; padding: 1px; background-color: #; border: 1px solid #DDDDDD; text-align: center;">[[File:Eihwaz Ring description.png|link=Eihwaz Ring]]</span></span> |
|||
** [[Dagaz Ring]] {{verification}} |
|||
**[[File:Dagaz Ring icon.png|22px|link=]] <span class="has-image-popup">[[Dagaz Ring]]<span class="image-popup" style="z-index: 10;width: ??? px; padding: 1px; background-color: #; border: 1px solid #DDDDDD; text-align: center;">[[File:Dagaz Ring description.png|link=Dagaz Ring]]</span></span> |
|||
** [[Eihwaz Ring]] {{verification}} |
|||
**[[File:Othila Sash icon.png|22px|link=]] <span class="has-image-popup">[[Othila Sash]]<span class="image-popup" style="z-index: 10;width: ??? px; padding: 1px; background-color: #; border: 1px solid #DDDDDD; text-align: center;">[[File:Othila Sash description.png|link=Othila Sash]]</span></span> |
|||
** [[Othila Sash]] {{verification}} |
|||
[[Category:Battle Systems]] |
[[Category:Battle Systems]] |
||
Latest revision as of 10:52, 5 September 2021

|
Details
Can I participate?
Only the following can participate in Einherjar:
- 1. Players who have installed the Aht Urhgan Expansion disc and registered its contents.
- 2. Players who are level 60 or higher.
- 3. Solo/Parties/Alliances with 1-36 members.
Note: Players need not have completed any Aht Urhgan missions or mercenary promotion quests to participate.
How do I get in?
Players are required to take the following steps to enter the Hazhalm Testing Grounds:
1. Obtain a ![]() Smoldering Lamp:
Smoldering Lamp:
Smoldering lamps can be purchased from Kilusha in Nashmau for 60,000 gil. Only one smoldering lamp is necessary for an entire group to enter the battlefield.
- Upon completion of Rhapsodies of Vanadiel Mission 1-16 and obtaining the Key Item "Rhapsody in Azure", the cost is lowered to 1,000 gil and the entry time is reduced to once every Earth hour.
2. Make a reservation:
- Reservations can only be made for wing 2 and 3 battlefields if one of the following qualifications is met:
- Reserving player possesses all feathers from each of the individual lower tier battlefields.
- Reserving player possesses the Mark of the Einherjar key item.
- Reservations may only be made for Valgrind by players who possess at least one feather from each of wings 1, 2, and 3.
- All players entering Valgrind will also need at least one feather from each of wings 1, 2, and 3.
- Reservations last 30 minutes from the moment they are made.
- A reservation's time limit can be viewed in the glowing lamp's help window.
- If another party already occupies the selected chamber, the smoldering lamp will not light, and players can either select another chamber or wait for the one they chose to open. Note: Odin's Chamber and Odin's Chamber II occupy the same space, so only one or the other may be accessed by a group at any given time.
- There are no longer any time limitations placed on parties smaller then 6 as of September 2015.
Trading a Smoldering Lamp to the Entry Gate in the Hazhalm Testing Grounds will open a dialogue with several options, including the option to reserve a particular chamber. Upon making the chamber reservation, the Smoldering Lamp will be replaced with a ![]() Glowing Lamp.
Glowing Lamp.
3. Copy and distribute glowing lamps:
By using the glowing lamp, players can create replicas. These replicas can be traded to other players, allowing them entry into the chamber indicated on the lamp. Up to 36 players can enter the same chamber at once. An unlimited number of glowing lamps can be produced, however, entry into the reserved chamber is limited to the first 36 players to trade their lamp to the gate. Once 36 people have entered the chamber, all remaining lamps will become void, even if players inside the chamber choose to exit. Glowing lamps can be sold on bazaars as well as traded.
4. Enter the chamber:
To enter the reserved chamber, players need only trade their glowing lamp to the Entry Gate and select "yes" from the query window. Note that the player who made the area reservation must enter before any others may enter.
What happens if I leave the area?
If players leave the area via magic or by returning to their Home Points, they will not be allowed re-entry into the chamber, regardless of time remaining on the reservation. After entering a chamber, players will be required to wait at least 20 Earth hours before they can enter the training grounds again.
- Note: The person that makes the reservation, their timer starts the moment they did or after the 3 minute entrance grace period, it's one of them. Not once they actually enter.
- Upon completion of Rhapsodies of Vanadiel Mission 1-16 and obtaining the Key Item "Rhapsody in Azure", the lockout period is reduced to just one Earth hour.
Players can check the amount of time remaining (in Vana'diel days) before they may re-enter Hazhalm by checking the Entry Gate in Hazhalm Testing Grounds.
If all players in a chamber remain KO'd for more than 3 minutes, everyone will be teleported out of the area.
Note: If a player leaves their reserved chamber by Teleporting, Returning to their Home Point, or any forms of Warp, any ampoules of viscous Therion Ichor is forfeit.
- A player teleported out of the area to the entrance in order to be compensated with earned Ichor. This can be done the following ways:
- Dropping your Glowing Lamp.
- Being teleported out of the area upon all participants being KO'd for 3 minutes.
- Time expiration.
What do I do inside?
Players do not need to be in the same party and/or alliance to participate in battles fought within the chambers. In addition, all players will be allowed to lot on any items found via a chamber-wide loot pool. The name of the player with the current highest lot number will be displayed next to the item in the treasure window.
Upon clearing a chamber, an armoury crate will appear in the center of the area. The chamber's feather will be obtained once the crate is opened, and players in the chamber will have five minutes to lot on all items, regardless of the amount of time remaining on the chamber reservation. However, the armoury crate must be opened before the original reservation ends (defeating the boss does not stop the timer).
Einherjar Wings and Enemies
Monster Appearance System
With the exception of Valgrind, monster appearances in Einherjar are randomly chosen from a set unique to each wing. See the Einherjar Wing pages for more information on possible monsters and bosses.
Special Monsters
While fighting in the wing one, two, and three chambers, one of four special monsters will appear several minutes into the battle. Defeating (or not defeating) the monster will have one of several effects as listed below. Heithrun is significantly rarer than the other three.
|
Einherjar Wings
Rewards

In wings one through three, after defeating all the enemies in a chamber, an armoury crate will appear in the middle of the room. Odin will drop items immediately upon defeat. After exiting a chamber by dropping the Glowing Lamp or timing out, Ichor will also be received, which may be exchanged for various rewards.
Key Items: Einherjar Feathers
Upon clearing a chamber and opening the armoury crate, all players will receive a key item feather. There is one for each chamber, and the run leader (and each member of the alliance) will need at least one from each rank to enter into either of Odin's Chambers in Valgrind. All of the feathers from all players will vanish at the moment of entry into Valgrind. Players who either possess one feather from each tier or have defeated Odin (level 75) in the past (obtaining the title "Elite Einherjar") can obtain a Mark of the Einherjar by clicking the ??? spot in Hazhalm Testing Grounds. This allows them to reserve entry into any wing 2 or 3 chambers without having to clear chambers from previous wings and most importantly allows them to spend ichor to purchase items which can be traded for feathers (see below).
Therion Ichor
Upon exiting the chamber, players will also receive ampoules of Therion Ichor depending on the chamber tier and what percentage of the base (non-boss) monsters were defeated. These can be used to purchase various items from Kilusha in Nashmau. Killing the boss (with the exception of Odin) awards no extra Ichor. Note that a chamber MUST be exited by dropping the Glowing Lamp or timing out in order to receive ichor. Players who warp or home point away from the battlefield will not receive ichor.
|
The following unique items can be purchased with Therion Ichor:
- These items can only be purchased with the Mark of the Einherjar in possession. They can be exchanged at the ??? in Hazhalm Testing Grounds for one of the KI feathers corresponding to each wing.
- 1,000 Ichor:
 Valkyrie's Tear (wing one feather)
 - 2,000 Ichor:
 Valkyrie's Wing (wing two feather)
 - 3,000 Ichor:
 Valkyrie's Soul (wing three feather)
- 1,000 Ichor:
- These items may be purchased at any time.
- 5,000 Ichor (Cursed Item Materials): Rubber Cap, Rubber Harness, Rubber Gloves, Rubber Chausses, Rubber Soles, Nethereye Chain, Netherfield Chain, Netherspirit Chain, Nethercant Chain, Netherpact Chain
- 15,000 Ichor (Accessory Equipment): Animator +1, Aslan Cape, Gleeman's Cape, Ritter Gorget, Kubira Bead Necklace, Morgana's Choker, Buccaneer's Belt, Iota Ring, Omega Ring, Delta Earring
- 100,000 Ichor (Mythic Weapon Requirement): Balrahn's Eyepatch
Abjurations
Original (sky/land HNM) abjurations as well as Einherjar-specific abjurations can be obtained from the reward crates in tiers 1 through 3 while multiple abjurations drop from Odin in Valgrind. Note that not all sky/land HNM abjurations (those that are obtained from Kirin, for instance) can be obtained from Einherjar. All cursed items and abjurations should be taken to Alphollon C Meriard for "spiritual cleansing." The two abjuration sets unique to Einherjar are the Phantasmal Abjuration Set and the Hadean Abjuration Set.
Odin Equipment
Aside from the Einherjar-specific abjuration sets, the only other drops unique to Einherjar are exclusively obtained by defeating Odin in Valgrind. Upon defeat, there is a chance that Odin will drop one of the unique items from the list below, depending on the version of Odin which was battled.


Pages in category "Einherjar"
The following 14 pages are in this category, out of 14 total.
